This homemade basil salt turns fresh basil and coarse sea salt into a fragrant, green-speckled seasoning for tomatoes, roasted vegetables, potatoes, eggs, pasta, soups, sandwiches, and more. The recipe uses only two ingredients, but the drying step matters: the mixture needs to become completely dry and crumbly before it goes into a jar.
Basil is a tender, high-moisture herb, so this version does not rely on leaving a damp basil-and-salt mixture on the counter overnight. The National Center for Home Food Preservation notes that basil can mold if it is not dried quickly. A low oven or dehydrator gives you much better control over moisture.
Table of Contents
Why This Homemade Basil Salt Recipe Works
It uses only fresh basil and coarse sea salt, with no oil or extra moisture added.
Pulsing the basil with salt breaks the leaves into small pieces and spreads the basil flavor through the seasoning.
Drying the mixture in a thin layer helps moisture escape more evenly.
The finished salt is easy to crumble, spoon, and sprinkle instead of forming a damp paste in the jar.
You can scale the recipe up or down as long as you keep the mixture spread thin while drying.
The same basic method can be adapted to other sturdy culinary herbs after you account for their different moisture levels.
The goal is not to make basil “preserve” the salt or to claim extra health benefits. This is simply a practical way to combine an herb with salt and remove enough moisture for a dry seasoning.
What Homemade Basil Salt Tastes Like
The finished seasoning is salty first, with a clear basil aroma and a slightly grassy, peppery herb note. It is stronger and more concentrated than sprinkling fresh basil on a dish because the basil is dispersed throughout the salt. At the same time, it is not a replacement for fresh basil when you want soft leaves, bright color, or a classic fresh-basil garnish.
Because the basil is dried after being blended with the salt, the color usually shifts from bright green to a darker olive-green. That is normal. A dehydrator at a low temperature generally preserves color better than a hotter oven, while the oven is the more accessible option for most kitchens.
Ingredients You’ll Need
Fresh basil: Use clean, unwilted leaves with no dark, slimy, or damaged spots. Rinse only if needed, then dry the leaves very thoroughly before measuring. Surface water makes the drying step take longer.
Coarse sea salt: Coarse crystals give the finished seasoning a pleasant texture and are easier to spread over the drying tray. Kosher salt can also work, but crystal size changes how much salt fits in a measuring cup, so the final sodium level can vary by brand.
You do not need oil. Oil makes this a different type of seasoning and would prevent the finished mixture from behaving like a dry salt blend.
Equipment
Food processor or mini chopper
Measuring cups
Rimmed baking sheet
Parchment paper
Flexible spatula or spoon
Clean, completely dry airtight jar
A food processor gives the most even result, but a sharp knife also works. Finely mince the basil, mix it thoroughly with the coarse salt, and continue with the same drying method.
How to Make Homemade Basil Salt
1. Dry the basil before blending
After rinsing, spread the basil on a clean towel and blot it gently. Let the leaves air-dry briefly until there is no visible water clinging to the surfaces. Starting with dry leaves shortens the oven time and reduces clumping.
2. Pulse basil and salt
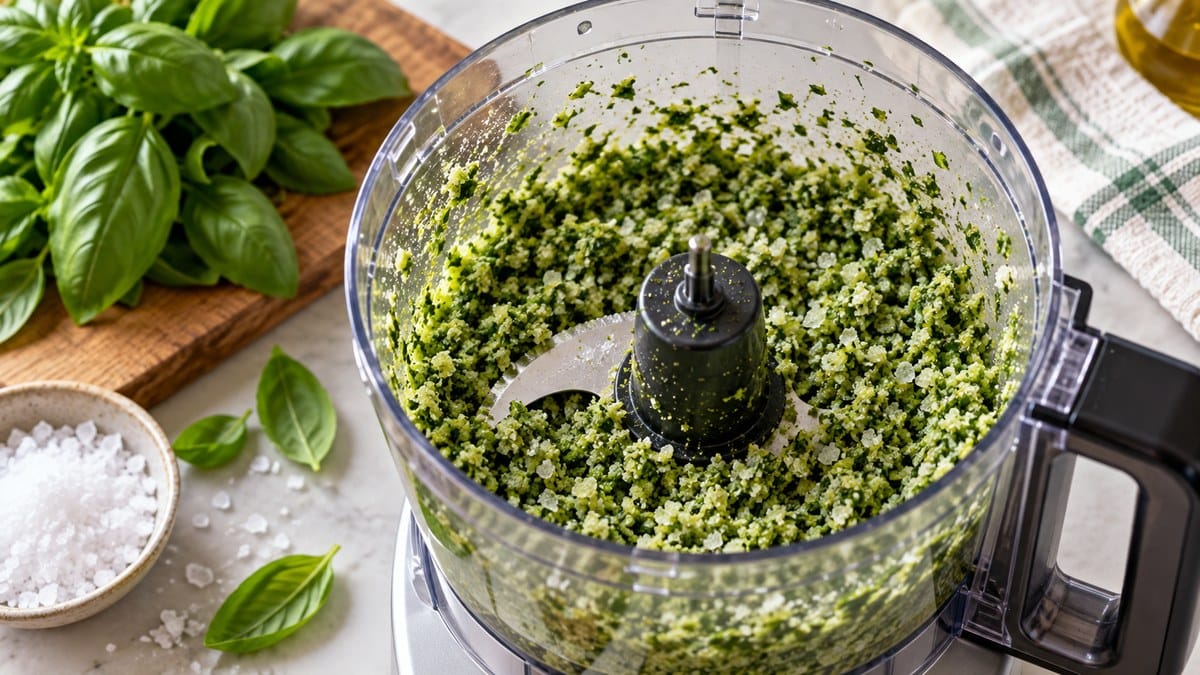
Add the basil and coarse sea salt to the food processor. Pulse in short bursts, scraping down the bowl as needed, until the basil is finely chopped and evenly distributed. Stop before the mixture turns into a wet puree. You want damp-looking salt crystals with small basil flecks.
3. Spread the mixture thinly
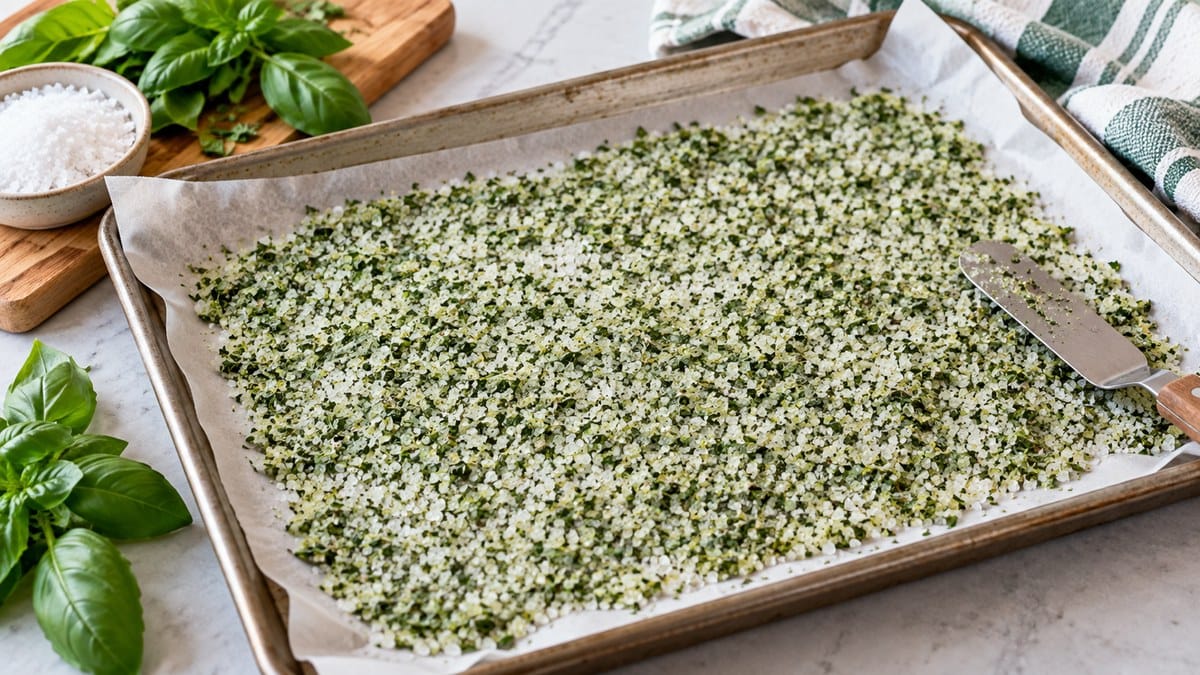
Line a rimmed baking sheet with parchment. Spread the basil-salt mixture in a thin, even layer, breaking up thick piles with a spatula. More surface area means faster, more even drying.
4. Dry at low heat
Set the oven to its lowest practical temperature, ideally around 170°F and not above 180°F. Dry for about 3 hours, stirring and redistributing the mixture every 45 to 60 minutes. Depending on your oven, humidity, and how wet the basil was, it may need longer. Penn State Extension recommends keeping oven-drying temperatures for herbs at or below 180°F and drying until the herbs are completely dry. Follow your appliance manual if it gives specific instructions for low-temperature drying.
5. Check for complete dryness
The basil pieces should feel crisp rather than flexible, and the seasoning should crumble easily between dry fingers. If you find cool, soft, or damp clumps, spread them out and continue drying. Do not seal a warm or damp batch in a jar.
6. Cool, crumble, and jar
Let the basil salt cool completely on the tray. Rub any larger dry clusters between your fingers or pulse them once or twice in the food processor. Transfer to a clean, dry airtight jar and label it with the date.
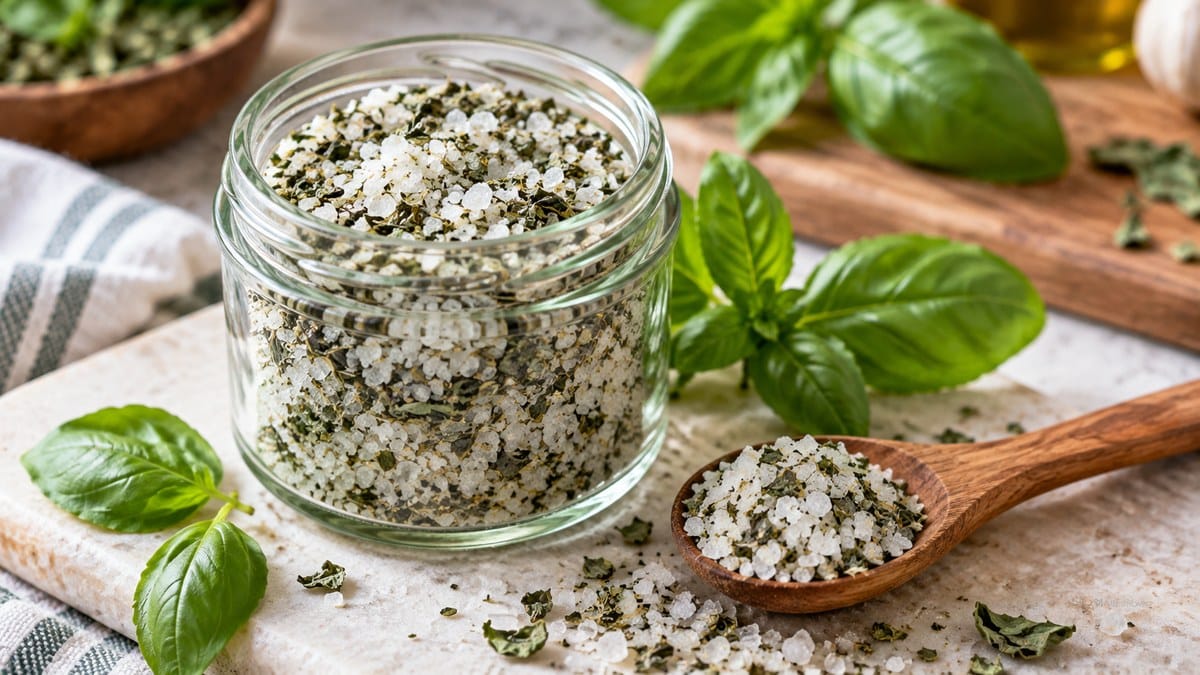
A two-ingredient basil salt made with fresh basil and coarse sea salt, dried at low heat until crisp and easy to sprinkle.
Total Time:3 hours 10 minutes
Yield:about 3/4 cup
Ingredients
Scale
2 packed cups fresh basil leaves, rinsed if needed and dried very thoroughly
1/2 cup coarse sea salt
Instructions
Heat the oven to its lowest practical setting, ideally about 170°F and no higher than 180°F.
Add the thoroughly dry basil leaves and coarse sea salt to a food processor. Pulse in short bursts until the basil is finely chopped and evenly distributed through the salt; do not process into a wet puree.
Line a rimmed baking sheet with parchment paper and spread the basil-salt mixture in a thin, even layer.
Dry for about 3 hours, stirring and redistributing the mixture every 45 to 60 minutes. Continue drying longer if needed until the basil pieces are crisp and the seasoning crumbles easily with no damp clumps.
Remove the tray from the oven and cool the basil salt completely.
Crumble any dry clumps by hand or pulse briefly in a clean, dry food processor.
Transfer to a clean, dry airtight jar. Store in a cool, dry, dark cupboard and keep moisture out of the container.
Notes
Dryness matters more than exact oven time. Do not jar the mixture while it is warm or damp.
For a dehydrator, dry at about 105°F until crisp and fully dry, checking after 2 hours and continuing as needed.
Use a dry spoon and keep the jar away from steam, heat, and direct sunlight.
Sodium varies significantly with salt brand and crystal size; nutrition is an estimate.
If the seasoning develops condensation, visible moisture, or signs of spoilage, discard it.
Author:Adam Moretti
Prep Time:10 minutes
Cook Time:3 hours
Category:Seasoning
Method:Oven Drying
Cuisine:American
Diet:Vegan
How to Know the Basil Salt Is Dry Enough
This is the most important part of the recipe. Color alone does not tell you whether the basil is dry. Instead, use texture: the basil should be crisp, the crystals should separate easily, and the mixture should not feel cool or damp when squeezed between dry fingertips.
The National Center for Home Food Preservation describes dried herb leaves as ready when they are crispy and crumble easily. That same cue is useful here because the fresh basil is the ingredient bringing moisture into the salt blend. If you are unsure, give the mixture more drying time rather than sealing it early.
Troubleshooting Homemade Basil Salt
The mixture is still damp after three hours
Spread it more thinly, break up clumps, and continue drying in 30-minute increments. Very juicy basil, humid weather, or a crowded baking sheet can all extend the time. Two smaller trays usually dry more evenly than one thick layer.
The basil turned dark
Some darkening is normal during drying. High heat speeds browning, so use the lowest practical oven temperature. For greener color, use a dehydrator set around 95°F to 110°F; Penn State Extension recommends that temperature range for dehydrating herbs.
The basil salt formed hard clumps in the jar
Clumping usually means the mixture absorbed moisture or was packed before it cooled completely. If there is no sign of spoilage and the mixture is simply humid, spread it on a clean tray and dry it again until crisp. Always cool fully before returning it to the jar.
The seasoning tastes too salty
Basil salt is still a salt-based seasoning, so use it in small amounts. Rather than sprinkling both plain salt and basil salt on the same dish, use the basil salt as the main finishing salt and taste before adding more.
The basil flavor seems weak
Fresh basil varies in aroma, and flavor gradually fades in storage. Use the newest leaves you have, avoid excessive oven heat, and keep the finished jar away from the stove, sink, sunlight, and other warm or humid areas.
Dehydrator Method
A dehydrator is an excellent alternative when you want better control over temperature. Spread the processed basil-salt mixture in a thin layer on a suitable solid liner or tray insert, then dry at about 105°F. Check after 2 hours and continue until the basil is crisp and the mixture is completely dry. Exact time varies with the machine and humidity.
The National Center for Home Food Preservation gives a general dehydrator range of 95°F to 115°F for herbs, while Penn State gives 95°F to 110°F. Use your dehydrator manual for tray liners and airflow recommendations, especially with fine salt crystals.
Ways to Use Basil Salt
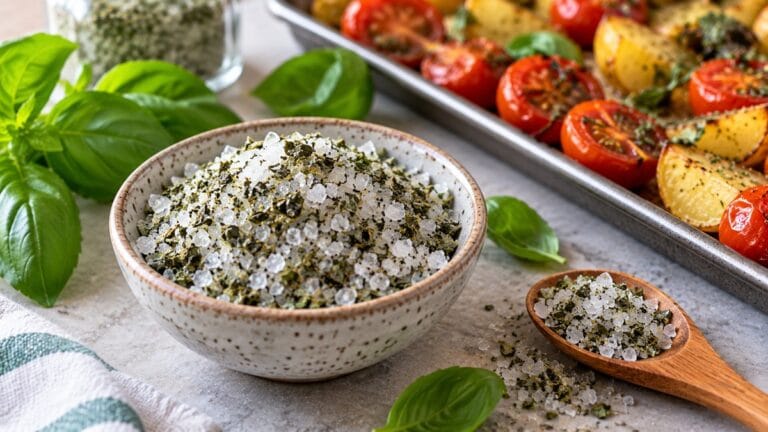
Tomatoes: Sprinkle lightly over sliced tomatoes, bruschetta, or tomato toast.
Roasted vegetables: Season potatoes, zucchini, green beans, mushrooms, or cauliflower after roasting.
Eggs: Use a small pinch on scrambled, fried, or hard-boiled eggs.
Pasta: Finish simple olive-oil pasta, tomato pasta, or pasta salads.
Soups: Add near the end so you can control the salt level after the broth has reduced.
Sandwiches: Add a tiny pinch to tomato, avocado, or mozzarella sandwiches.
Vegan spreads: Stir a small amount into our vegan mayo recipe, then reduce the plain salt in the spread.
Weeknight dinners: Use it as one of the finishing seasonings for simple meals from our dinner recipes collection.
Start with less than you think you need. Because every pinch contains salt, it is easier to add more basil salt at the table than to correct an oversalted dish.
Variations
Basil-garlic salt
For a dry pantry seasoning, use garlic powder rather than fresh garlic. Stir 1/2 to 1 teaspoon garlic powder into the fully dried basil salt after it cools. Fresh garlic adds moisture and changes the storage considerations.
Basil-lemon salt
Use finely grated lemon zest only if you dry the zest thoroughly with the basil-salt mixture. Spread everything thinly and continue drying until the zest is crisp. Avoid adding lemon juice because the goal is a dry seasoning.
Basil and rosemary salt
Replace up to one-quarter of the basil with fresh rosemary leaves. Rosemary is stronger, so a little goes a long way. Pulse until the rosemary is finely chopped, then dry the blend using the same texture cues.
Finer finishing salt
After the dried seasoning cools, pulse it briefly in a clean, dry processor. Stop while some texture remains. Turning it into a very fine powder can make it harder to sprinkle evenly by hand.
Storage and Food Safety
Store fully dried homemade basil salt in an airtight container in a cool, dry, dark cupboard. Both the National Center for Home Food Preservation and Penn State Extension recommend protecting dried herbs from moisture, heat, and light. Penn State notes that most dried herbs keep well for up to a year, although aroma gradually fades.
For this homemade blend, quality is usually best during the first several months. More important than a calendar date is dryness: if the jar develops condensation, the seasoning becomes damp, or you notice any sign of spoilage, discard it. Do not try to rescue a visibly spoiled batch.
Use a dry spoon, close the lid promptly, and keep the jar away from steam near the stove or sink. Moisture entering the container is the main storage problem to prevent.
FAQ about Homemade Basil Salt
Can I make homemade basil salt with dried basil?
Yes, but it will taste different and there is no need for the long drying step. Start with about 1 tablespoon dried basil for every 1/4 cup coarse salt, mix well, taste, and adjust. Dried basil is more concentrated than fresh basil.
Can I air-dry the fresh basil and salt overnight?
A damp basil-salt mixture is not the best place to rely on casual overnight air-drying. Basil is a high-moisture herb, and authoritative home-preservation guidance emphasizes drying tender herbs quickly enough to avoid mold. A dehydrator or controlled low oven is more predictable.
Can I use kosher salt instead of sea salt?
Yes. Choose a coarse kosher salt and measure by volume, but expect the saltiness to vary because crystal size and brand density differ. Taste the finished blend in a small amount of food before seasoning an entire dish.
Can I use a blender instead of a food processor?
A small blender can work, but use short pulses. A powerful blender can turn the basil into a wet paste and grind the salt too finely. Stop as soon as the basil is evenly chopped through the crystals.
How long does homemade basil salt last?
When it is thoroughly dried and stored airtight away from heat, light, and moisture, it can retain useful flavor for months. General extension guidance says most properly dried herbs keep well for up to a year, but this homemade blend will taste brightest earlier. Discard it if moisture or spoilage appears.
Why is my basil salt not bright green?
Heat and drying naturally darken basil. The flavor matters more than neon color. Lower drying temperatures generally preserve color better, which is one reason a dehydrator can produce a greener result than an oven.
Final Tips
For reliable homemade basil salt, begin with dry basil leaves, process them with coarse salt, spread the mixture thinly, and keep drying until every part is crisp and crumbly. Cool completely before sealing the jar.
Use the finished seasoning as a finishing salt rather than an automatic extra layer of salt. A small pinch is enough to bring basil aroma to tomatoes, vegetables, eggs, pasta, soups, spreads, and sandwiches without needing a separate herb garnish.