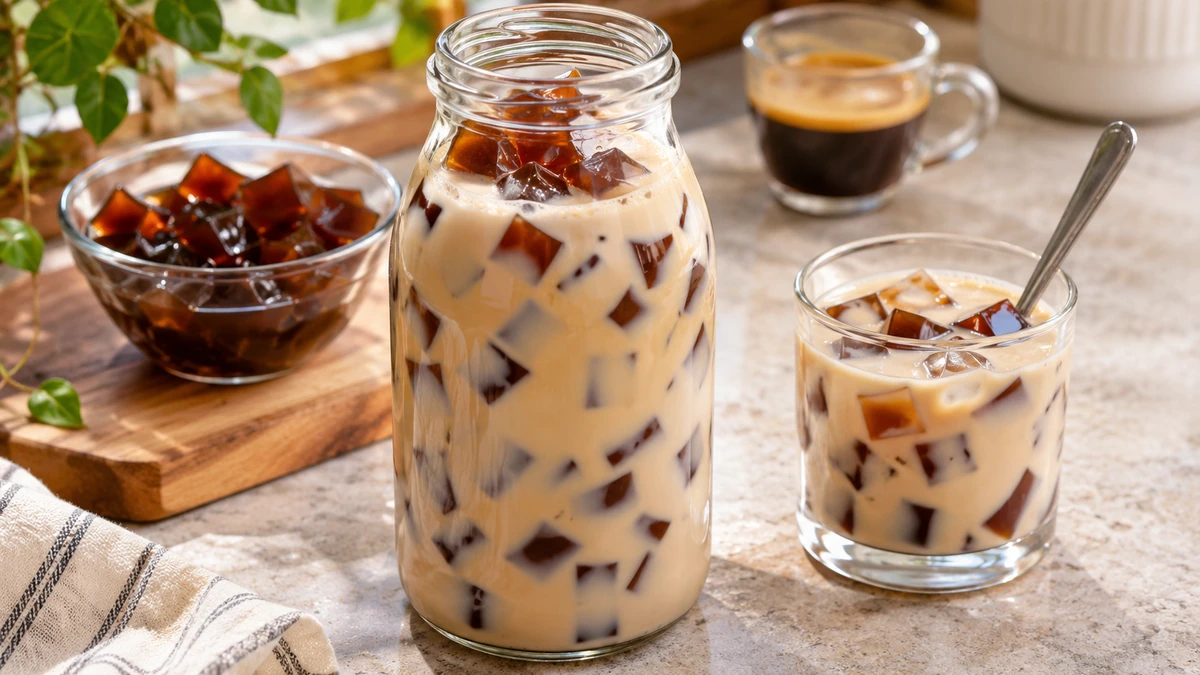
This coffee jelly in a bottle recipe combines tender, bite-size coffee jelly cubes with cold milk and a little sweetened condensed milk in a reusable, wide-mouth bottle. It is a chilled coffee drink with a soft, wobbly texture—not a bottle of solidified coffee and not a smoothie. You make the jelly first, cut it small, then add the cold milk mixture when you are ready to drink it.
The method uses one standard 7-gram envelope of unflavored gelatin, 1¾ cups strong brewed coffee, ¼ cup cold water, and two tablespoons of sugar to make approximately two cups of jelly. That is enough for four 12-ounce bottles, each filled with roughly ½ cup jelly and ¾ cup creamy milk mixture, leaving room at the top. The hands-on steps are short, but the jelly needs about 3½ hours in the refrigerator to set. For a completely smooth drink with no jelly, our vegan iced coffee recipe is the simpler alternative.
Table of Contents
What Is Coffee Jelly in a Bottle?
Coffee jelly is brewed coffee set into a soft gel using gelatin or a plant-based gelling agent. In this bottled drink, the set coffee is diced, spooned into a jar or bottle, and surrounded by sweetened milk. Each sip or spoonful contains creamy milk and distinct coffee-flavored pieces. A similar jelly is served as a dessert in Japan; the Japanese coffee jelly guide at Just One Cookbook shows the more traditional bowl-style version. Our recipe is specifically for a bottled, drinkable presentation, with smaller cubes and more milk.
For this coffee jelly in a bottle recipe, the key is the container. Choose a clean, food-safe, wide-mouth bottle or jar that holds at least 12 fluid ounces (355 mL) and has a lid that fits. A narrow-necked beverage bottle traps large cubes and is hard to clean. When the texture is new to you, a glass and spoon are easier than trying to sip through a standard straw. This coffee jelly in a bottle recipe is also different from the flavored syrups in our banana syrup recipe for coffee: the coffee itself becomes jelly rather than remaining a liquid sweetener.
Why This Coffee Jelly in a Bottle Recipe Works
A single standard envelope of gelatin makes coffee jelly that can be cut into small pieces rather than left as a stiff slab.
Strong coffee stays recognizable after the jelly is chilled and paired with milk.
Blooming gelatin in cold water before adding it to hot coffee prevents powdery clumps.
Chilling the jelly in a shallow dish speeds up setting and makes the cube size more consistent.
Sweetened condensed milk gives the milk a rounded café-dessert flavor without needing a separate cooked syrup.
The jelly and milk mixture are kept separate until serving, preserving cleaner layers and better texture.
A wide-mouth bottle makes filling, stirring, cleaning, and serving much more practical.
The texture in this coffee jelly in a bottle recipe is deliberately different from bubble tea pearls. Gelatin jelly is tender and slippery, not chewy like tapioca, and it can break if shaken vigorously. That is why the method favors a gentle swirl or a spoon, not a blender. If you like creamy desserts with bold coffee flavor, our cookie butter Dunkalatte copycat is another chilled, indulgent drink idea, but it does not contain jelly.
Ingredients for Coffee Jelly in a Bottle Recipe
In this coffee jelly in a bottle recipe, the ingredient list separates the coffee jelly base from the sweetened milk. All quantities below make four bottles. Use regular brewed coffee for the classic version or decaf if you want coffee flavor without regular caffeine. The recipe does not require instant coffee, flavored creamer, whipped topping, or gelatin dessert mix.
For the Coffee Jelly
Use 1¾ cups (420 mL) strongly brewed hot black coffee, ¼ cup (60 mL) cold water to bloom the gelatin, one 7-g envelope of unflavored powdered gelatin, and 2 tablespoons (about 25 g) granulated sugar. Brew the coffee slightly stronger than you usually drink; the flavor will mellow when mixed with milk. Avoid a coffee that is already sweetened or blended with dairy, because it changes both the sweetness and the setting mixture.
Do not pour the dry gelatin directly into hot coffee. Sprinkle it evenly over the cold water, let it absorb for five minutes, then whisk the swollen gelatin into the hot coffee. A small saucepan helps if the coffee cools too much, but you should not maintain a rolling boil after adding gelatin. If you prefer a jelly-free fruit coffee instead, our blueberry coffee recipe uses strained blueberry syrup for an entirely different texture.
For the Sweet Milk and Bottles
Use 3 cups (720 mL) cold 2% dairy milk, 4 tablespoons (¼ cup) sweetened condensed milk, and ½ teaspoon vanilla extract if you like a gentle vanilla aroma. Divide evenly: each bottle gets ¾ cup milk and one tablespoon condensed milk. Choose four clean 12-ounce wide-mouth bottles or lidded jars; the milk and jelly together occupy about 10 fluid ounces before any optional ice.
Sweetened condensed milk is concentrated and already sugary. Do not confuse it with unsweetened evaporated milk or coffee creamer. If you use oat milk, almond milk, or a dairy-free condensed alternative, the texture and nutrition change; the gelatin in the standard recipe is still animal-derived. For a completely plant-based coffee foam rather than coffee jelly, compare our cloud coffee with aquafaba, which follows a very different technique.
Equipment and the Best Bottle Size
One small heatproof bowl for blooming gelatin, plus a whisk or spoon.
A small saucepan or heatproof measuring jug for mixing hot coffee.
A shallow 8-by-8-inch or similarly sized container to set the jelly.
A clean cutting board, small sharp knife, and spoon or silicone spatula.
Four clean, food-safe, wide-mouth 12-ounce bottles or jars with secure lids.
A refrigerator that stays at 40°F (4°C) or below.
Do not make the jelly by pouring hot coffee into a thin, cold drinking bottle. Thermal shock can crack some glass, and cooling a deep full bottle can take longer than cooling a shallow tray. Set the jelly separately and move it to the bottles only once cold. A reusable mason-style jar with a wide mouth is an excellent starting point. If you plan to drink rather than spoon the cubes, a suitably wide straw may work for adults, but make the jelly very small and do not force pieces through a narrow opening.
Coffee Jelly in a Bottle Recipe — Tasty Recipe Card
For serving: 4 clean, wide-mouth 12-ounce bottles or jars with lids
Instructions
Brew 1 3/4 cups of strong black coffee and keep hot. Put 1/4 cup cold water in a small heatproof bowl; sprinkle the 7-g gelatin envelope over the surface and let bloom for 5 minutes until evenly swollen.
Add 2 tablespoons granulated sugar to the hot coffee. Whisk in the bloomed gelatin until no visible grains remain. If needed, warm gently in a small saucepan while stirring; do not boil vigorously.
Pour the smooth coffee mixture into a clean shallow heat-safe dish. Let it stop steaming briefly, refrigerate promptly, and chill on a level shelf for approximately 3 1/2 hours, or until completely set in the center.
Cut the cold jelly into small cubes about 3/8 inch (1 cm) across. Lift gently with a clean spoon or flexible spatula; the yield should be approximately 2 cups of diced jelly.
In a separate pitcher, whisk 3 cups cold 2% milk, 4 tablespoons sweetened condensed milk, and 1/2 teaspoon vanilla if using, until the thick condensed milk is completely incorporated.
Spoon approximately 1/2 cup coffee jelly into each of four clean wide-mouth 12-ounce bottles. Pour about 3/4 cup sweet milk into each, leaving headspace. Cover, refrigerate, and gently swirl only once before serving. Eat with a spoon or use an appropriately wide opening; do not force large pieces through a narrow straw.
Notes
This is a homemade gelatin coffee jelly drink; it is not a shelf-stable commercially processed bottled beverage.
One batch makes approximately 2 cups coffee jelly and 3 cups sweet milk, enough for 4 bottles. A serving is 1/4 of each component, approximately 1/2 cup jelly plus 3/4 cup sweet milk (about 10 fl oz before optional ice).
Gelatin must bloom in cold water first. A different brand or a plant-based agar substitute can require different amounts and cooking steps; do not substitute one-for-one without a tested method.
Regular gelatin is animal-derived and the standard milk mixture contains dairy; the default recipe is not vegetarian or vegan.
Refrigerate at 40°F (4°C) or below. Keep the jelly and milk separate until serving where possible. Use plain jelly within 2 days for best quality and assembled bottles preferably within 24 hours. Discard drinks left unrefrigerated longer than 2 hours, or 1 hour above 90°F.
Nutrition is estimated per bottle using 2% milk, sweetened condensed milk at approximately 130 calories per 2 tablespoons, sugar, and a 7-g gelatin envelope. No optional garnish is included. It is not laboratory tested.
Author:Adam Moretti
Prep Time:15 minutes
Chilling Time:3 hours 30 minutes
Cook Time:5 minutes
Category:Drinks
Method:Stovetop and Chilling
Cuisine:Japanese-inspired café drink
Diet:Contains dairy and animal-derived gelatin; not vegetarian or vegan
The card includes the full jelly batch and all four servings of milk. It makes approximately four 10-ounce drinks in 12-ounce containers. One serving is one bottle, not the whole tray of jelly. Follow the chill time before moving to the final assembly.
How to Make Coffee Jelly in a Bottle Recipe Step by Step
1. Brew Strong Coffee and Bloom the Gelatin
Brew 1¾ cups of strong black coffee. It should be hot enough to dissolve the bloomed gelatin, but it does not need to be actively boiling. Meanwhile, pour ¼ cup cold water into a small heatproof bowl. Scatter the contents of one 7-gram envelope of unflavored gelatin evenly over the surface. Wait 5 minutes without stirring aggressively. The granules should look swollen and wrinkled, with no islands of dry powder. This is called blooming.
If gelatin is tipped into hot liquid all at once, its outside can hydrate before the center, forming hard-to-dissolve granules. Even distribution over cold water gives the powder time to absorb moisture. If you see a dry patch, let it hydrate rather than adding extra gelatin. The coffee jelly in a bottle recipe depends on correct blooming more than on any special brand of coffee.
2. Dissolve the Sugar and Gelatin in the Hot Coffee
Stir two tablespoons sugar into the freshly brewed hot coffee. Add the bloomed gelatin and whisk until it dissolves completely, about one minute. If the coffee has cooled, warm it briefly in a small saucepan over low heat, stirring, until everything is smooth. Do not let the gelatin mixture boil vigorously. Look at the surface and sides of the jug: there should be no visible gelatin grains or rubbery clumps.
The liquid remains thin at this point; it does not thicken into jelly immediately. If it looks frothy from vigorous mixing, let it stand briefly so most bubbles rise. Coffee foam on the surface is harmless but can create a patchy-looking top once chilled. For another café-style coffee with a different mixing order, see our brown sugar cookie shaken espresso; that recipe uses ice and shaking rather than gelatin.
3. Pour Into a Shallow Dish and Chill
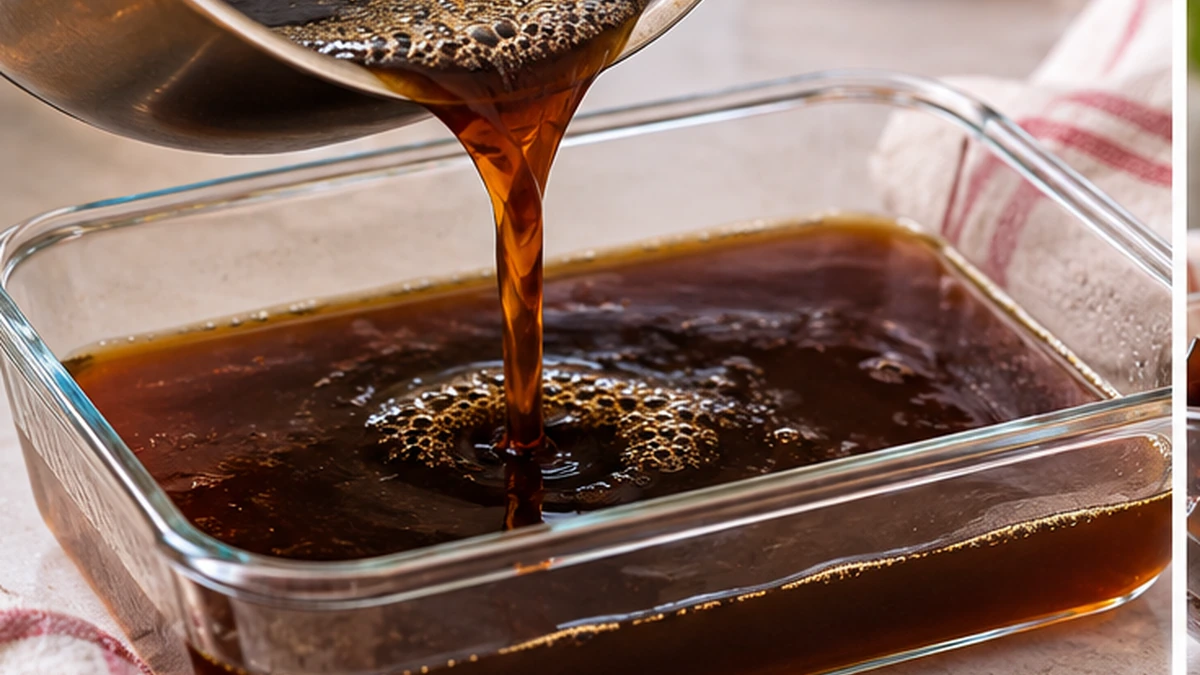
Pour the hot coffee mixture into a clean, heat-safe shallow dish. Leave a little space below the rim so it can be moved safely. Allow it to stop steaming briefly, then refrigerate promptly in a level spot. Chill for approximately 3½ hours, or until the center is fully set and the slab can be cut without flowing back together. Do not leave this mixture on the counter for hours to cool; use a shallow container to cool it efficiently.
A 1-inch-deep layer is much easier to portion than a tall cylinder. The surface should wobble as one piece when the dish is gently nudged, while a clean knife should make a defined cut. If it still moves like a liquid in the middle, give it more time. Cold coffee can sometimes look hazy; that does not automatically mean the gelatin failed.
4. Cut Jelly Into Small, Even Cubes
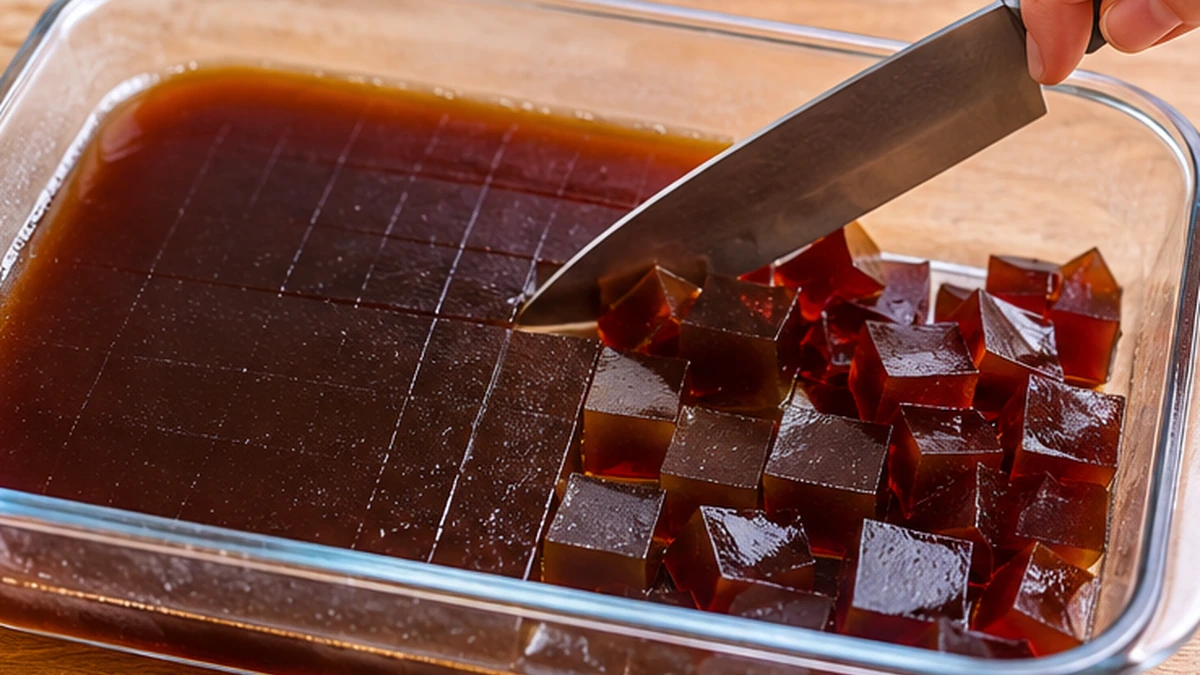
Slide a thin knife along the edges of the dish and cut the set jelly into pieces roughly ⅜ inch (about 1 cm) across. Run the knife straight down in a grid rather than trying to slice the jelly with a sawing motion. Use a damp spoon or flexible spatula to lift the cubes gently. They should hold their shape but still wobble, with shiny smooth sides.
Small cubes are easier to spoon into a jar and easier to eat. A large 1-inch cube may look dramatic in a photo, but it is inconvenient in a bottle and can block a straw. If the jelly crumbles, it may have been cut too finely or handled too roughly; if it smears like liquid, it probably needed longer chilling or better-dissolved gelatin. You can serve imperfect pieces in a glass with a spoon without discarding the batch.
5. Stir Together the Sweet Milk
In a clean pitcher, whisk 3 cups chilled 2% milk, ¼ cup sweetened condensed milk, and the optional ½ teaspoon vanilla extract until uniform. The condensed milk is thicker than regular milk, so scrape the bottom of the pitcher to make sure none remains in a sweet puddle. Taste the milk mixture by itself; it should seem mildly sweet, not like straight dessert sauce, because the jelly also contains sugar.
For more sweetness, add a small extra amount of condensed milk to an individual serving rather than increasing the entire pitcher. For less sweetness, halve the condensed milk and expect a lighter drink; that modification changes the nutrition estimate. If you enjoy sweet toppings but do not want to change this recipe, our strawberry cold foam without heavy cream is designed for an entirely separate iced drink.
6. Fill and Finish the Bottles
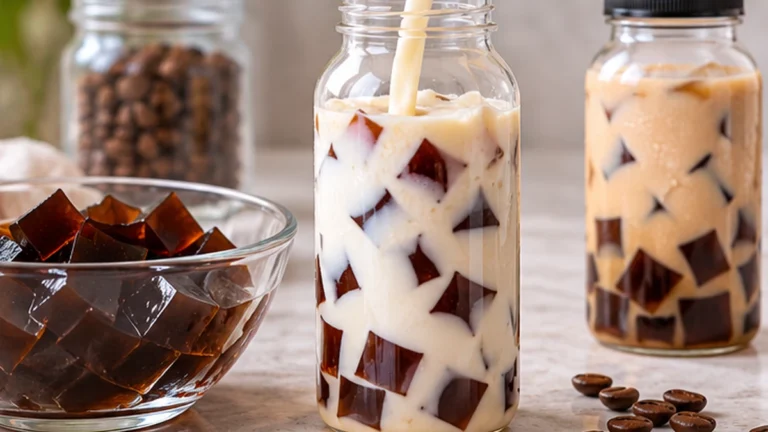
Spoon roughly ½ cup of cut coffee jelly into each of four clean wide-mouth bottles. Pour in ¾ cup of the cold sweet milk per bottle. Leave at least about an inch of space at the top if you plan to close and transport them. Screw on the lids, keep cold, and gently roll or swirl each bottle once so some milk moves around the cubes. Do not shake vigorously or the cubes can fragment.
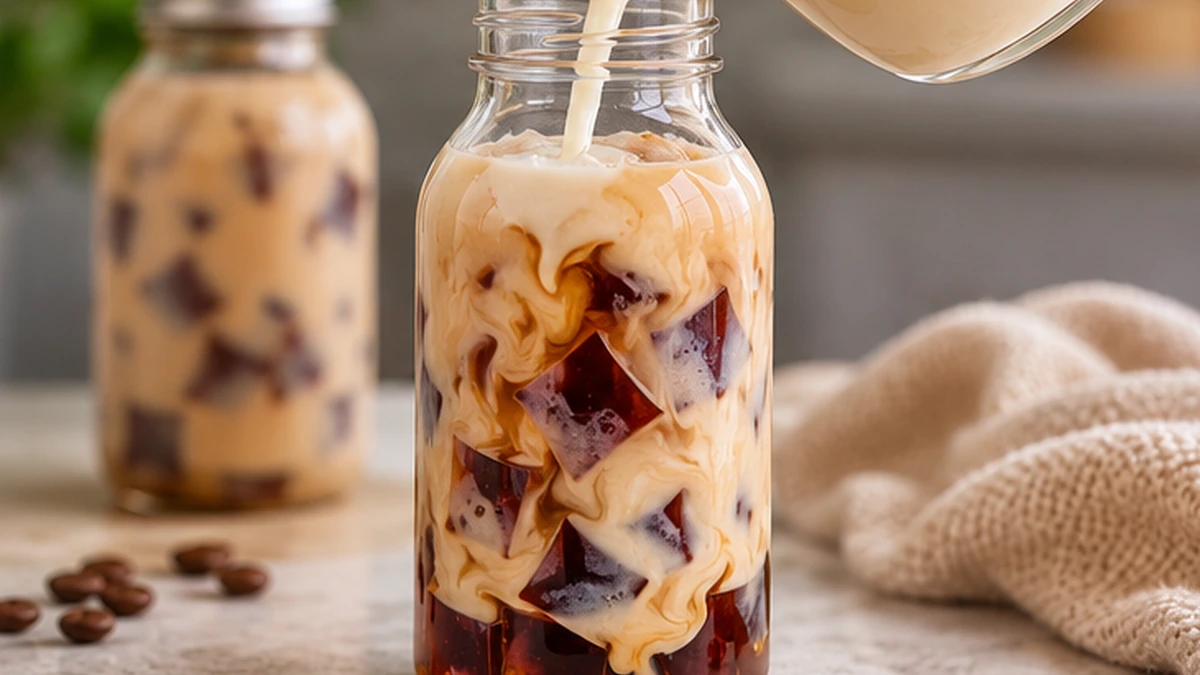
For the prettiest presentation, add the milk down the side of the bottle rather than directly onto the jelly. Pale milk settles into the spaces between dark cubes, creating the marbled pattern. You can also serve the same ingredients in a wide glass with a spoon if your bottles are hard to fill or clean. The coffee jelly in a bottle recipe is best enjoyed cold while its jelly pieces are still distinct.
The Right Gelatin Ratio and Texture
For this coffee jelly in a bottle recipe, the base contains one 7-g envelope for roughly two cups of finished coffee mixture (1¾ cups coffee plus ¼ cup bloom water). That is a practical starting point for soft, cuttable gelatin cubes. Brands, coffee concentration, and refrigeration temperatures can vary. Do not assume a gel made with 7 g gelatin and 2 cups liquid will behave identically to a gel made with agar powder or a pre-sweetened jelly mix.
To make the coffee jelly in a bottle recipe more spoonable, cut the cubes smaller rather than automatically reducing the gelatin. A very loose gel may turn into fragments when moved between containers. If you need a firmer cube for a platter-style dessert, gelatin amounts may need adjustment, but that makes a different eating experience and is not the goal here. For an example of a solid sliceable gelatin dessert that is not a coffee drink, our berry gelatin bars recipe illustrates why the texture should match how the food is served.
Troubleshooting Coffee Jelly in a Bottle Recipe
Why Didn’t My Coffee Jelly Set?
First check the chill time: a thick dish takes longer than a shallow one. If the batch is still liquid after several hours, the gelatin may not have bloomed evenly, may not have dissolved, or may have been measured incorrectly. Use a full standard envelope, not a partial one, and make sure the coffee mixture totals roughly two cups including the bloom water. A very hot rolling boil after gelatin is added is unnecessary. Do not promise that adding cold gelatin powder to an already chilled failed batch will fix it; it needs a new, properly dissolved mixture.
Why Are the Cubes Rubbery or Too Firm?
Rubbery coffee jelly often means too much gelatin for the liquid, or a much smaller liquid volume than intended. Check whether you used one full envelope rather than several, and whether the measuring cup was accurate. Cutting into ⅜-inch pieces improves the eating experience, but it cannot completely repair an over-firm gel. A softer next batch is more effective than mashing firm cubes into the milk.
Why Is My Bottle Hard to Drink?
The usual causes are a neck that is too narrow, pieces that are too large, or a conventional straw. Use an easy-to-clean wide-mouth bottle and small pieces, and eat with a spoon whenever necessary. Do not swallow large cubes quickly or tip the bottle back to force them out. This drink contains slippery, solid pieces and is not appropriate for young children or anyone who has difficulty swallowing.
Why Does My Milk Look Streaky or Separate?
Condensed milk may not have dissolved fully, or the coffee jelly may have been added while warm. Chill the jelly completely and whisk the milk mixture smooth before assembling. A little marbling is expected and looks attractive; distinct clumps of condensed milk at the bottom mean the milk was not mixed long enough. A gentle swirl usually redistributes the milk without damaging the jelly.
Variations and Substitutions
Decaf Coffee Jelly Bottles
For a decaf coffee jelly in a bottle recipe, use strongly brewed decaf coffee in the same amount. This is a better choice when avoiding ordinary coffee caffeine, although decaf coffee is not always completely caffeine-free. Keep the remaining ingredients and chill process unchanged. If you want a no-gelatin cold coffee, our iced banana bread latte is another option that uses familiar café ingredients.
Dairy-Free Milk Variation
Replace the 2% milk with a chilled plant milk that tastes good in coffee, and use a compatible dairy-free condensed substitute if you want the same sweet, creamy effect. The standard gelatin is still animal-derived, so changing only the milk does not make the recipe vegan or vegetarian. Agar requires its own amount and heating method and should not be swapped gram for gram into these directions. Our vegan iced coffee remains a better tested starting point for a fully plant-based coffee beverage.
Less-Sweet or Vanilla Coffee Jelly
Reduce the granulated sugar in the jelly to one tablespoon and the condensed milk in the pitcher to two tablespoons for a less-sweet version. The cubes will still be coffee-forward, but the whole drink will have fewer sugars and fewer calories than the nutrition estimate in the card. Alternatively, add ¼ teaspoon more vanilla to the milk mixture for aroma without extra sugar. Do not compensate for less sugar by adding a large amount of raw instant coffee powder to the milk; it can taste gritty.
Dessert-Style Glass Instead of a Bottle
Serve ½ cup cubes in a wide glass, pour ¾ cup sweet milk over them, and add a little whipped cream only if desired. This changes the garnish and nutrition but can be easier for guests to eat. For another cold, creamy coffee dessert-style drink, our Merry Berry Frappuccino uses a blended base rather than coffee jelly.
Make-Ahead, Refrigeration, and Food Safety
The separate coffee jelly can be made ahead in a clean, covered container. For the best texture and home-use quality, plan to use it within two days of making it. Keep the milk refrigerated separately until assembly and enjoy the filled bottles as soon as practical, preferably within 24 hours for best appearance. The bottled homemade drink has no validated shelf-stable storage life, even if you tighten the cap; do not store it in a pantry or treat it like commercially bottled coffee.
The CDC food-safety guidance advises keeping perishable foods refrigerated and not leaving them unrefrigerated longer than two hours, or one hour in temperatures above 90°F. Keep the fridge at 40°F (4°C) or colder, transport bottles with an ice pack if needed, and discard a drink that was left warm too long. Use clean bottles and utensils. Do not pour boiling coffee directly into a closed bottle or attempt home canning of this milk-and-gelatin recipe.
Freezing filled bottles is not recommended: milk can separate and gelatin may become watery or granular after thawing. If you want to serve a chilled beverage with less prep time than setting jelly, try our iced sugar cookie cream matcha, which does not require a multi-hour gelatin set.
Estimated Nutrition per Bottle
For this coffee jelly in a bottle recipe, the card estimates about 190 calories per bottle, with approximately 27 g carbohydrates, 26 g sugar, 5 g fat, and 9 g protein. The calculation uses one-quarter of a batch containing one 7-g gelatin envelope, 1¾ cups brewed coffee, 2 tablespoons sugar, 3 cups 2% milk, 4 tablespoons sweetened condensed milk, and ½ teaspoon vanilla. It excludes optional toppings or ice (which has no calories). Exact values depend on the milk and condensed-milk brands and your measured yield.
For comparison, common 2% milk reference data put a cup near 122 calories and about 8 g protein, and sweetened condensed milk labels often show about 130 calories per two tablespoons. These are ingredient benchmarks, not a laboratory analysis of the finished drink. A larger portion, full-fat milk, extra condensed milk, or flavored creamers will change the nutrition substantially.
Coffee Jelly in a Bottle Recipe FAQs
Can I Put the Coffee Jelly Directly Into the Bottle to Set?
You can chill a liquid gel in a container, but it would set as one large plug rather than separate drinkable cubes. It is also harder to cool, cut, or serve through a narrow neck. For this coffee jelly in a bottle recipe, set the coffee in a shallow dish first, then dice and transfer the cubes. That is what creates the recognizable floating jelly-and-milk appearance.
Can I Use Instant Coffee?
Yes. Prepare 1¾ cups of strong instant coffee using the product’s label as a starting point, then use it as the hot brewed coffee in the recipe. Taste before adding gelatin: it should be pleasantly strong because cold milk softens its intensity. Do not change the overall liquid volume or the ¼ cup cold bloom water.
How Big Should the Coffee Jelly Pieces Be?
About ⅜ inch (1 cm) is a good default for a wide-mouth bottle and spoon. Larger pieces are harder to pour and cannot reliably pass through a normal straw. The texture should be soft and bouncy, not a hard choking hazard. Serve in a bowl or glass with a spoon when in doubt.
Can I Make Coffee Jelly in a Bottle Without Condensed Milk?
Yes. Replace the tablespoon of condensed milk in each serving with 1 to 2 teaspoons of granulated sugar or another sweetener dissolved thoroughly in the cold milk, or simply leave it unsweetened. The result will taste less rich and the nutrition will differ. Adding syrup from our banana coffee syrup recipe is another flavor variation, but it makes a distinctly banana-flavored drink.
Is This Coffee Jelly Drink Vegan or Gluten Free?
The default recipe is not vegan or vegetarian because regular gelatin is animal-derived and the sweet milk contains dairy. Coffee, sugar, and plain dairy ingredients do not inherently require wheat, but packaged gelatin, flavorings, and milk alternatives should always be checked if gluten cross-contact matters. Do not make a universal gluten-free claim without checking labels and preparation conditions.
How Long Does Coffee Jelly in a Bottle Last?
For this coffee jelly in a bottle recipe, keep the prepared components refrigerated and use the plain jelly within about two days for best quality, and assemble the milk drink close to serving. Aim to finish assembled bottles within 24 hours for texture. A tightly closed bottle does not make milk shelf-stable, and neither these ingredients nor this recipe have a tested commercial shelf life.
Final Tips for Coffee Jelly in a Bottle Recipe
Plan the chill time, not just the active preparation. Make the jelly in a shallow dish, cut it into small cubes, mix the milk separately, and use clean, wide-mouth containers. The best result shows distinct amber-brown pieces against pale coffee milk, with a gentle wobble when you move the bottle. If the cubes are too large or the milk is warm, the finished drink becomes harder to enjoy.
This coffee jelly in a bottle recipe is a satisfying change from standard iced coffee because the coffee flavor is carried by both the jelly and the creamy liquid around it. Start with the measurements above, keep the drink cold, and treat sweetness and milk choice as adjustments to one clearly defined base recipe. To explore more quick coffee drinks after trying the jelly version, see the quick and easy recipes collection.
Reviewed recipe options
Make this recipe fit me
Choose one of seven popular diet options. NutriMatch will confirm whether the recipe already fits, show a reviewed adaptation when available, or recommend recipes that match your choice.
Please choose a diet first.
Reviewed Dairy-Free adaptation
Dairy-Free Coffee Jelly in a Bottle Recipe (Creamy Japanese-Inspired Drink)
Use the substitutions below to prepare a Dairy-Free version while keeping the rest of the recipe as close as possible to the original.
Ingredient swaps
For the sweet milk (four bottles):Use For the sweet unsweetened soy milk (four bottles):
Use the dairy-free milk in the same measured amount unless the product label recommends otherwise.
Use a dairy-free sweetened condensed-milk alternative in the same measured amount; sweetness and thickness can vary by brand.
Check: Check packaged substitutes for milk ingredients and the cross-contact information you need.
Use these reviewed changes with the original ingredient quantities and instructions above. The original recipe card stays unchanged.
Recipe details, product formulas, and cross-contact information can change. Confirm current labels and use professional guidance when medically necessary.
Not available for this recipe
This recipe cannot currently be made Gluten-Free with a reviewed adaptation.
NutriMatch will not guess at substitutions. Try one of these recipes that is already reviewed for your choice.
Recipe details, product formulas, and cross-contact information can change. Confirm current labels and use professional guidance when medically necessary.
Not available for this recipe
This recipe cannot currently be made High Protein with a reviewed adaptation.
NutriMatch will not guess at substitutions. Try one of these recipes that is already reviewed for your choice.
Recipe details, product formulas, and cross-contact information can change. Confirm current labels and use professional guidance when medically necessary.
Not available for this recipe
This recipe cannot currently be made Keto with a reviewed adaptation.
NutriMatch will not guess at substitutions. Try one of these recipes that is already reviewed for your choice.
Recipe details, product formulas, and cross-contact information can change. Confirm current labels and use professional guidance when medically necessary.
Not available for this recipe
This recipe cannot currently be made Low Carb with a reviewed adaptation.
NutriMatch will not guess at substitutions. Try one of these recipes that is already reviewed for your choice.
Recipe details, product formulas, and cross-contact information can change. Confirm current labels and use professional guidance when medically necessary.
Not available for this recipe
This recipe cannot currently be made Vegan with a reviewed adaptation.
NutriMatch will not guess at substitutions. Try one of these recipes that is already reviewed for your choice.
Recipe details, product formulas, and cross-contact information can change. Confirm current labels and use professional guidance when medically necessary.
Not available for this recipe
This recipe cannot currently be made Vegetarian with a reviewed adaptation.
NutriMatch will not guess at substitutions. Try one of these recipes that is already reviewed for your choice.
Recipe details, product formulas, and cross-contact information can change. Confirm current labels and use professional guidance when medically necessary.